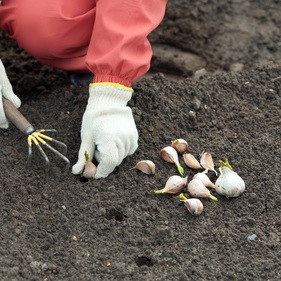
 Growing your own garlic is both easy and rewarding. Home grown garlic is far more nutritionally dense than supermarket garlic, not to mention the succulent taste. It’s one of the easiest plants to grow, requiring virtually zero upkeep. Here’s how to grow your own garlic in the garden.
It All Begins With the Soil
The soil should be crumbly. Soil that’s loamy is ideal. One great way to add nutrients to your soil is to compost directly into your soil. The soil area should have good drainage and strong sunlight. Though garlic plants can survive in the shade, they only truly thrive in direct sunlight.
Select Your Garlic Type
There are many different families of garlic plants you can choose from. From Marbled Purple Stripe to Porcelain or Silverskin, each brings a unique look, flavor and texture. Though experts disagree on exactly how many different types of garlic there are, they all agree that there are somewhere between 7 and 12 groups.
Choose the type of garlic you want to grow, then acquire some seed stock. You can get them online or at your local farmer’s market.
The Planting Process
Your newborn garlic plants are most vulnerable in their seedling stages. Microbacteria, fungus and other types of diseases can all interfere with the plant’s growth. To prevent that from happening, you can give it a protective “shield” before planting.
Mix two rounded tablespoons of baking soda, plus one tablespoon of liquid seaweed and mix it in a bowl. Add enough water to submerge all your cloves.
Peel your garlic cloves off your garlic bulbs. Discard the small cloves, as they tend to have lower yield and grow smaller plants. Soak your larger cloves in this mixture for 3 to 6 hours immediately prior to planting. Space your garlic 8 inches apart from one another. If space is an issue, you can do every 6 inches, but no closer.
Cutting the Scape
The scape is the long flowery top of the garlic plant. Though pretty to look at, they suck up nutrients from the plant that could otherwise be used to grow bigger bulbs. Unless garlic is a big part of your garden’s aesthetics, it probably makes sense to just cut them off.
Snipping off the scape is pretty simple: just cut it off as close to the base as possible, without harming the rest of the plant. The scape itself can be used for cooking or for decoration. It’s quite a beautiful flower. It also tastes silky and garlicky should you decide to cook with it.
It’s Harvest Time!
When half or more of the bottom leaves are brown, it’s time to harvest. Do not wait until all the leaves are brown. By that time, the bulbs will be past their maturation point. There will no longer be garlic “skin” to separate and protect the different sections of the bulb. Fungal diseases are much more likely to damage your bulbs at this stage.
Try to wait for a day when the soil is dry to reduce the likelihood of damaging the plants. Start digging away from the base of the plant. Burrow under the plant and pull it out gently.
Curing Your Garlic
Once you have all your garlic ready, sort them into bundles. Each bundle should have 7 or 8 bulbs. Find an area that’s dry and doesn’t get too much sunlight and definitely doesn’t get rained on. Windy areas are great. Leave it for a month to a month and a half.
After curing your garlic, you’re done! Just snip off the roots and slice off the stalks and you have your own home grown batch of garlic.
References:
1. http://www.organicgardening.com/learn-and-grow/garlic-growing-guide
2. http://www.thedailygreen.com/green-homes/blogs/organic-gardening/growing-garlic-460709
